
Imagine you’re working with your chainsaw when suddenly, the fates of the world unite and your chain falls off. Womp, womp. Not to worry, the Beaver is here to help. We’ll show you a step by step guide on how to put your chain back on your chainsaw.
Before you put the chain back on your chainsaw, make sure you’re wearing gloves. To reattach your chain, remove the front panel and take the bar and chain off. Line the chain back up on the bar. Hold the chain and bar together and place the chain around the sprocket. Reassemble, then tension your chain.
If you know exactly what to do from that description, wonderful. But if you need some more detail and visual cues, just keep reading, we’ve got you covered.
How to Put a Chain Back on a Chainsaw
Luckily, putting a chain back on a chainsaw is pretty easy.
But, as we mentioned, make sure you’re wearing a pair of hearty gloves. Your chainsaw chain is sharp and putting it back on may require you to grab the chain itself. No cut fingers, please.
Now that we have that safety announcement out of the way, let’s dig into the steps.
1. Remove the Front Panel
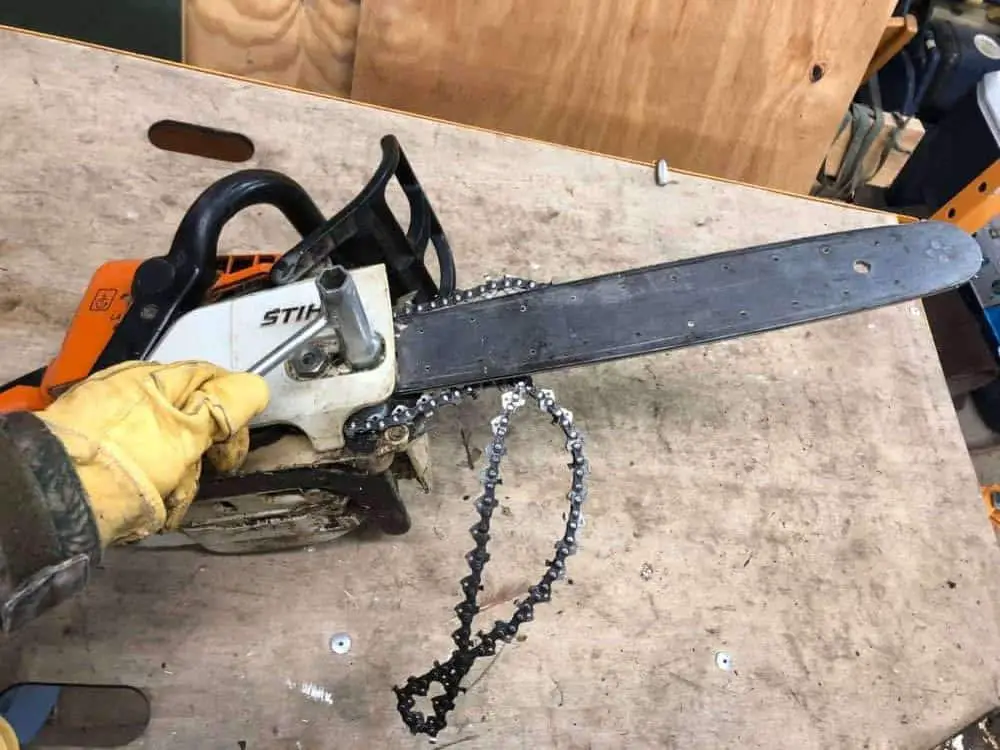
This part is easy. Simply take your chainsaw wrench tool and remove the front panel. Righty tighty, lefty loosey.
When you take the front panel off, since your chain isn’t holding the bar in place, the bar will fall out. I recommend holding onto the bar with one hand while you remove the panel the rest of the way.
2. Remove Bar and Chain
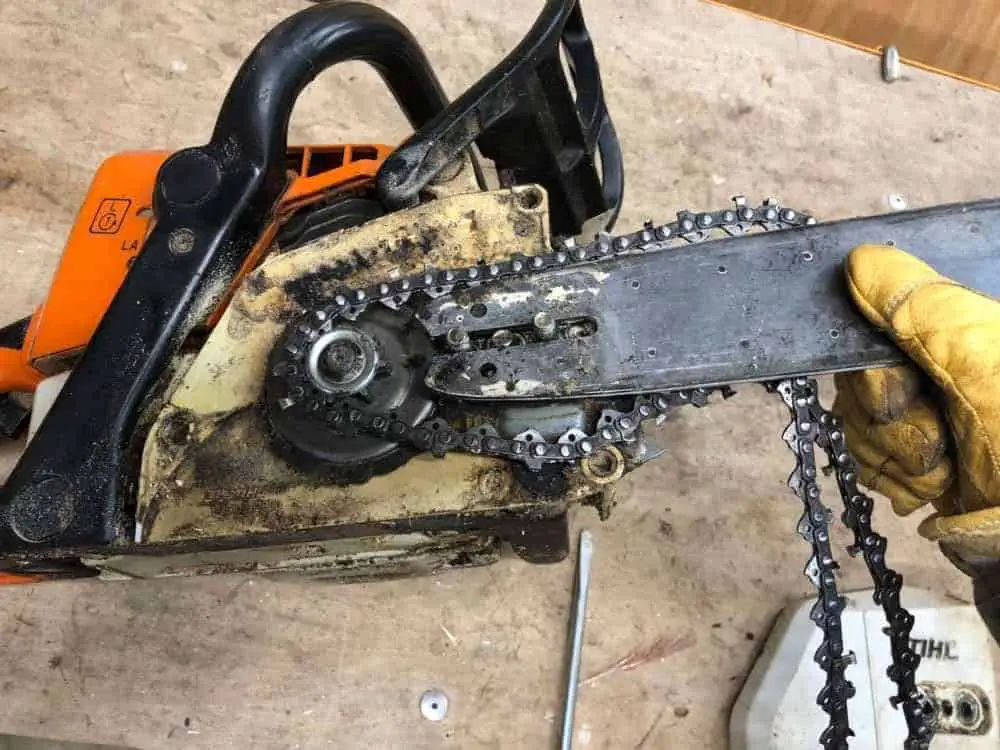
Now that you can see inside, remove the bar and chain.
Since you already have the panel off, now would be an excellent time to clean around the sprocket and clean your bar.
3. Line the Chain Up on the Bar
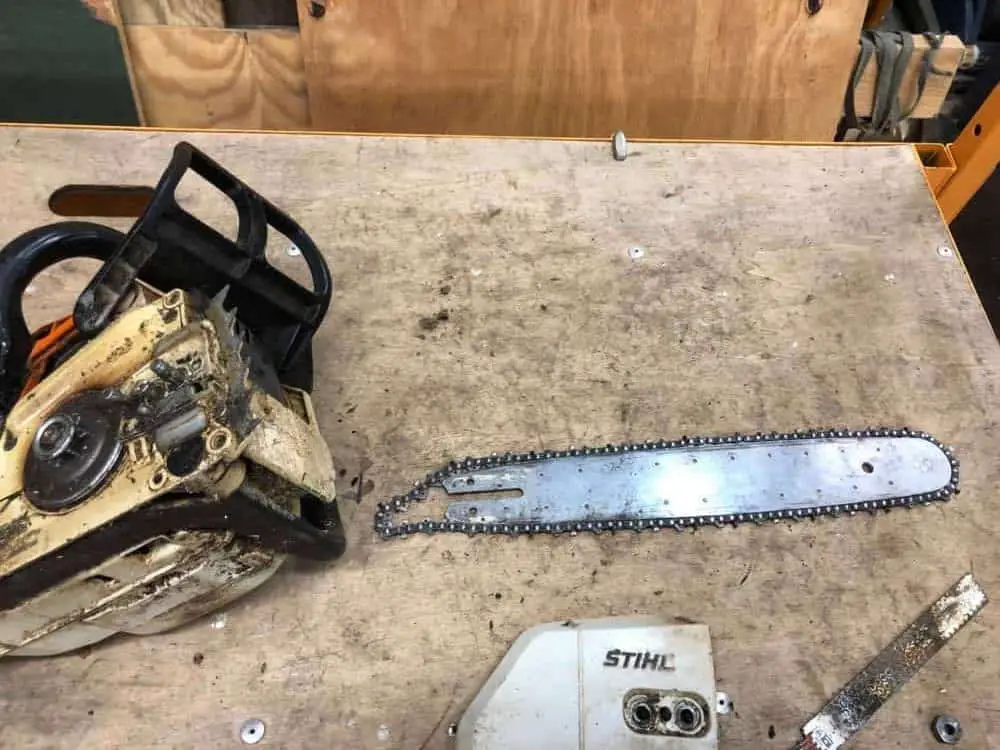
Now that the chain and bar are free from the sprocket, line the chain back up with the bar track.
3. Make Sure the Chain is Going the Right Direction
Before re-attaching everything, it’s a good idea to double check that the chain cutters are pointing in the right direction.
Yes, there is a right and wrong direction to put the chain on a chainsaw. Trying to cut anything with a chain on backwards is very irritating.
Here’s three quick ways to tell if you have your chain facing the right way.
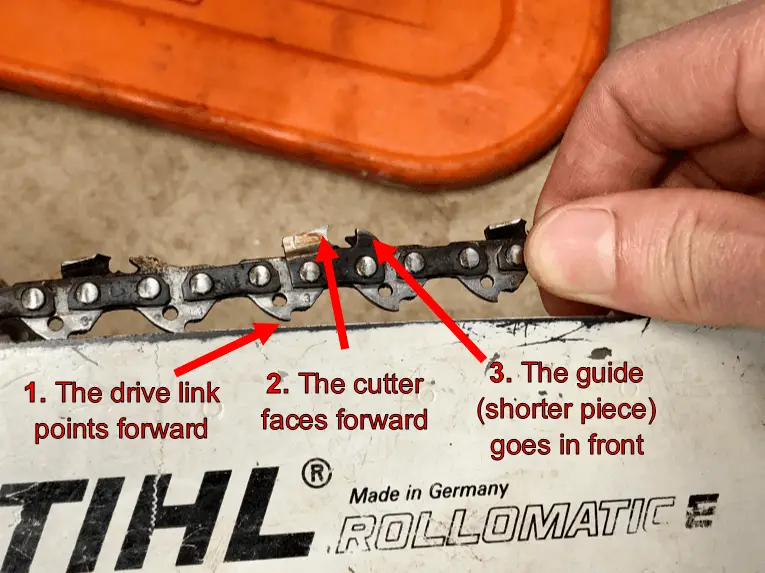
3.1 The Drive Link is Pointing Forward
On the top of your bar, look at the drive links and make sure they’re pointing forward. By forward we mean pointing towards the end of the bar and away from the machine (e.g. away from the engine).
If the drive links (on top of the bar) are pointing back towards the chainsaw engine, it’s facing the wrong direction.
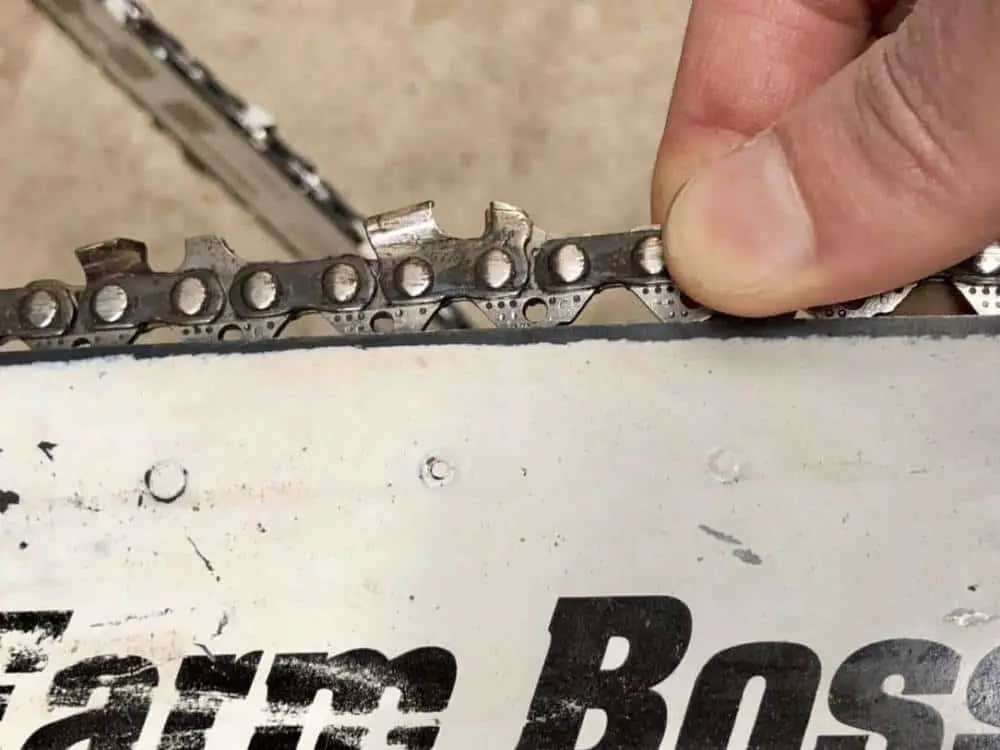
3.2 The Cutter is Facing Forward
The part of the chain that actually slices through the wood also needs to be facing forward (when on top of the bar).
To check this, look for the semi-circle shaped part on the chain, the semi-circle needs to be facing the end of the bar (when on top of the bar). See the image above for reference.
3.3 Guide is in Front
Lastly, make sure the shorter guide piece of the chain is in front of the cutter when on top of the bar.
Make sure these three things are happening and your chain will be going in the right direction.
If you want a little more detail on this subject, check out this article dedicated entirely to chain direction.
4. Reattach the Bar and Chain
The easiest way I found to do this was by grabbing the chain and bar together with a gloved hand. This way I’m holding the chain in place on the bar and getting the loop I need to put the chain around the sprocket.
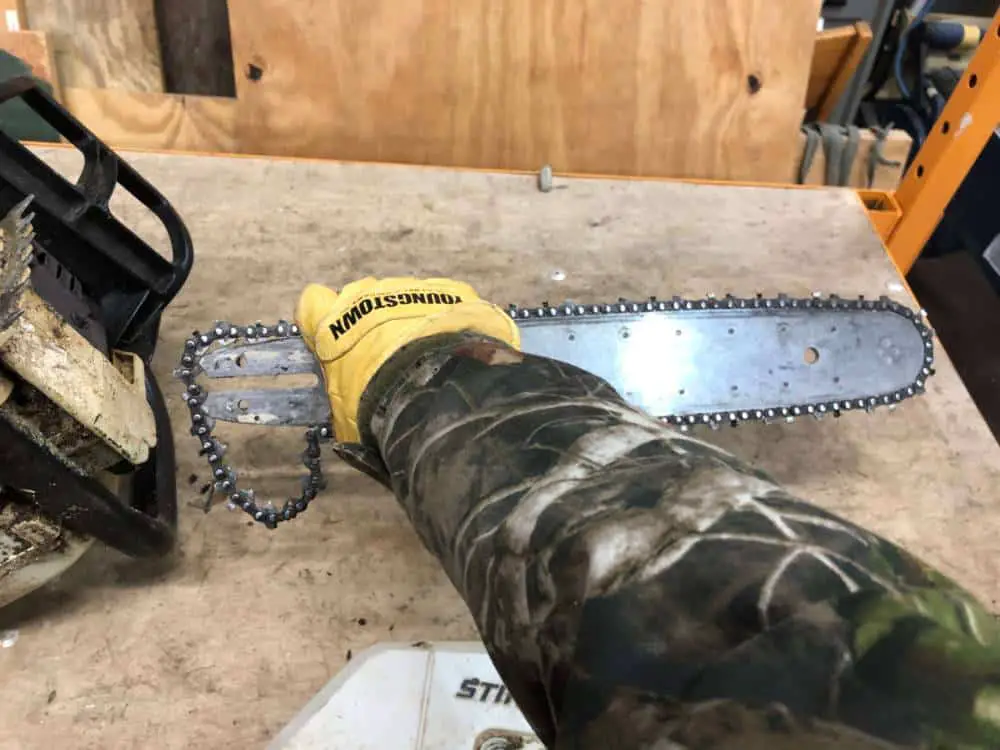
If grabbing the bar like that makes you nervous, you can also grab the bar from the top, the use your other hand to pull the chain taught on the end.
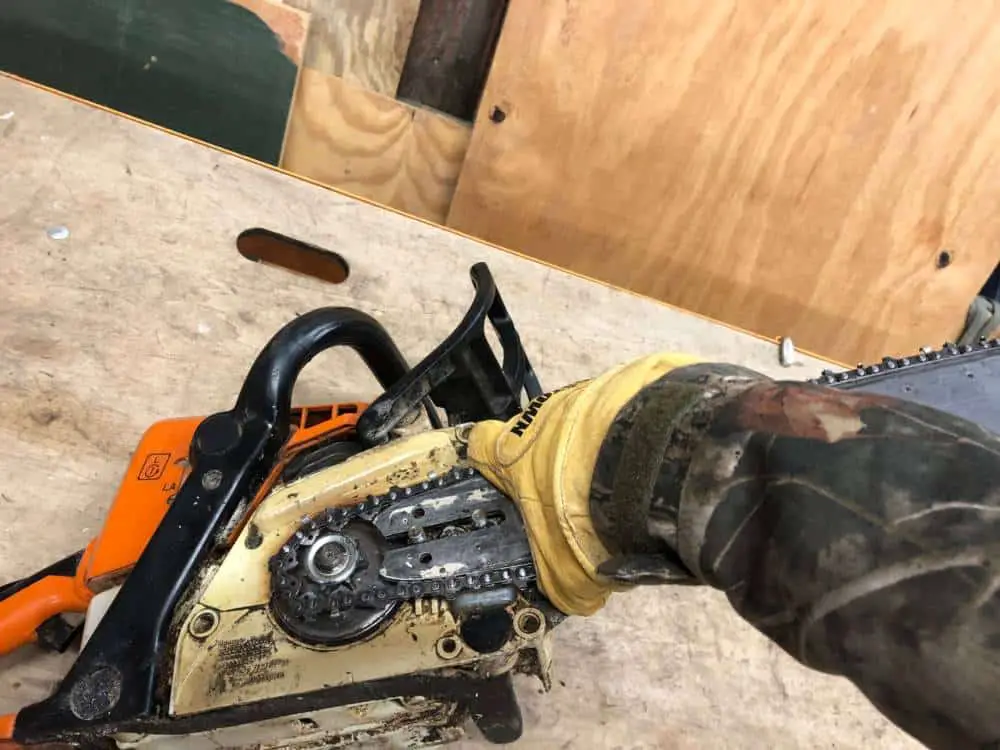
Now, get the chain wrapped around the sprocket and seat it onto the bolts.
5. Replace The Front Panel
Now just reverse what you did when you took the the panel off:
Replace the panel. Tighten the bolts.
6. Tension Chain
This step is very important because an improperly tensioned chain may be what caused it to fall off in the first place.
To make sure you’re getting your chain to the right tension, check out this article to learn two easy tests.
There, now you’ve successfully reattached your chain. But that’s not the end of it. If your chain fell off (rather than you removing it intentionally). Figuring out why it fell off in the first place can help you prevent it from happening again.
Why Did My Chain Fall Off?
There’s three main reasons why your chain could fall off: your chain is too loose, your bar track is dirty, or your bar track sides are too low. Let’s break down these issues and how to fix them.
Chain is Too Loose
This is the most likely reason why your chain fell off. Running your chainsaw with a chain that’s too loose can cause the chain to pop off when you start cutting.
This is not only annoying and problematic, but also dangerous. Making sure your chain is at the right tension is important and pretty easy.
There’s two tests to check the tension in your chain; the snap test and the pull test.
For the snap test, grab the chain with a well gloved hand and gently pull it away from the bar as far as you can. Allow the chain to snap back, if your chain is tight enough it should snap back into the track.
For the pull test, grab the chain and pull it gently away from the bar. The chain should pull away from the bar but the drive links shouldn’t pull completely out of the track.
If you’ve tried to tension your chain but you just can’t seem to get it tight enough, your chain might be the wrong size or it might need replaced.
An older chain is more likely to need replaced, imagine that. So if you have an older chain that won’t tension, I’d advise getting a new chain.
If your chain is relatively new, check the numbers on the chain to make sure you have the correct size. Here’s an article that’ll walk you through how to find that information.
Bar Track is Dirty
As you run your chainsaw, sawdust and wood chips can get into the bar track of your chainsaw.
If these pieces get built up or a larger piece gets stuck, it can cause your chain to get kicked out of the bar track.
To fix this all you have to do is clean your bar track.
To do this, remove the front plate, take off the bar and chain, and then clean out the bar track.
To clean out the bar track, you can either use a scrench and gauge tool (like the one shown below), or something small enough to fit in the track. Then simply slide it down the bar track to clean out the gunk.
Cleaning out the bar track is pretty easy to do while you’re replacing your chain since you already have the bar off.
Bar Track Sides are Too Low
The last reason that your chain may have fallen off is if the sides of your bar track have been worn down and have become too low.
As you can imagine, the chain sliding over the bar track creates quite a lot of friction. Over time, this friction where’s down the sides of the bar.
If the sides of your bar track are too low, the drive links on your chain may not stay set in the track and it could pop out.
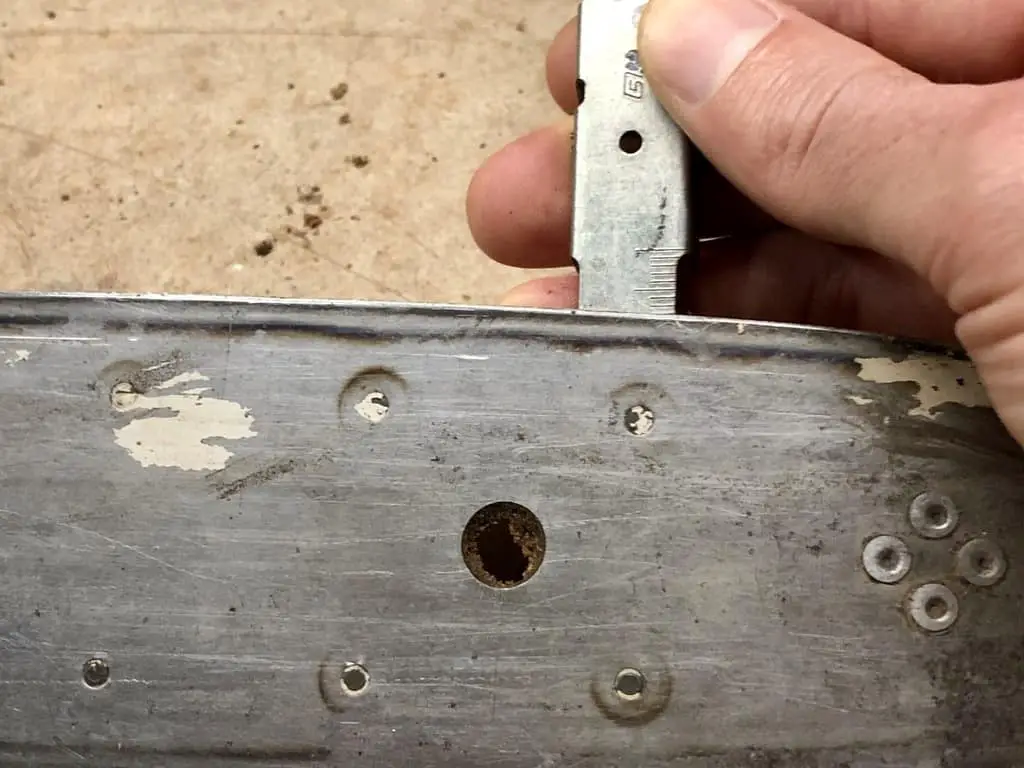
To check if your bar track is too low, use your scrench and gauge tool to measure the depth of the bar track. Put the gauge tool perpendicular and inside the track.
There’s a notch on the scrench and gauge tool, check out the picture below.

If the bar track is higher than this notch then your bar is good to go. If it’s at or lower than this notch, then it’s time to replace your bar.
If you need to replace your bar but you’re not sure what size you need. We have a great article that will tell you everything you need to know about that, check it out.
Wrap-Up
Putting your chain back on your chainsaw is pretty easy, and it also gives you the opportunity to do some cleaning.
While putting the chain back on is easy, there are a few steps that you need to make sure you get right. And, if your chain came off on its own, then you’ll want to know why it came off in the first place.
But, hopefully we’ve supplied you with everything you need to troubleshoot and fix the problem. Happy chainsawing!