If you’re reading this post, then congratulations. You’ve stumbled into one of the all-time classic chainsaw blunders.
Getting your chainsaw chain direction correct, is a common source of frustration for anyone who never had the good fortune of being shown the easy way.
A chainsaw doesn’t cut right with a backwards chain. Plus, from a safety perspective: if the chain is backwards all the cutters are facing you! Chain direction is not rocket science, but it’s very important for running a chainsaw effectively (and safely).
We’re gonna get you up-and-running, and it’ll only take 3ish minutes (go ahead, time me). Follow these 4 steps to get your chainsaw chain headed in the right direction.
If you just want to double check a chain that’s already in-place, skip to step 3, which will show you a quick way to check.
Get Chainsaw Chain Direction Right
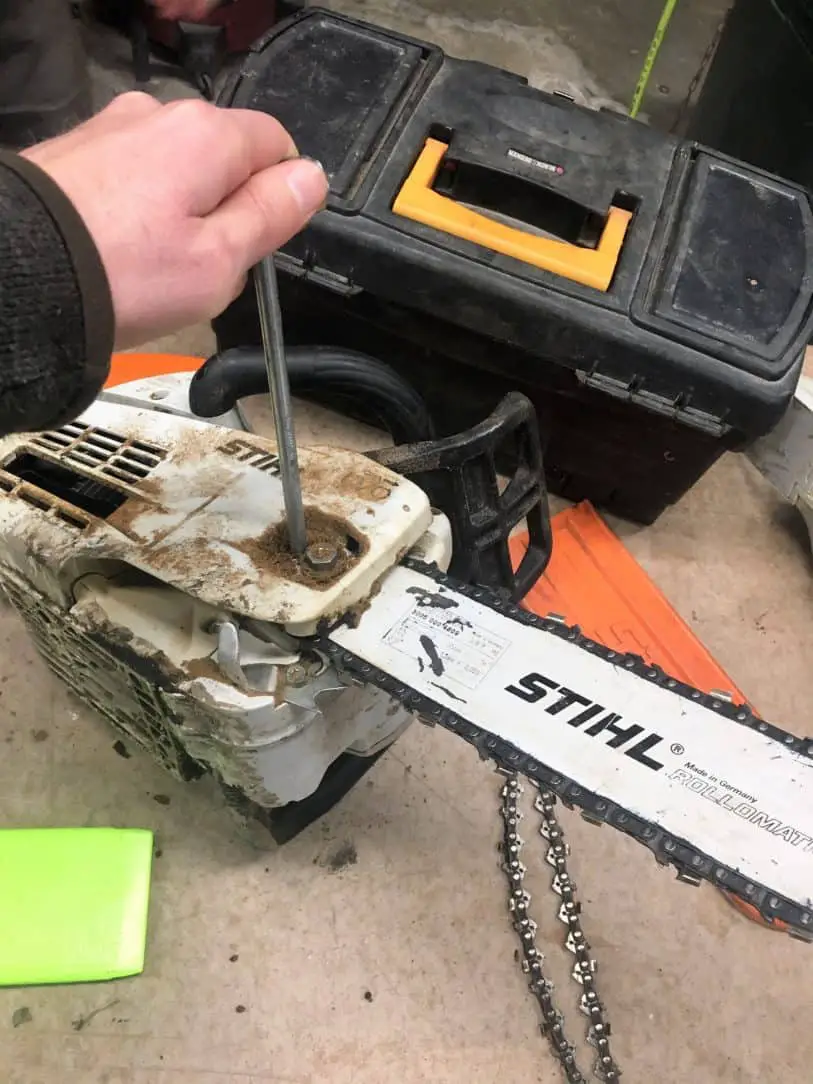
1. Remove the chainsaw casing
First thing’s first, get ready to replace your chainsaw chain. This means removing the side casing from your chainsaw so you can get to the bar and chain.
Great – so far so good!
This will let you get to the bar and chain.
2. Remove the chain
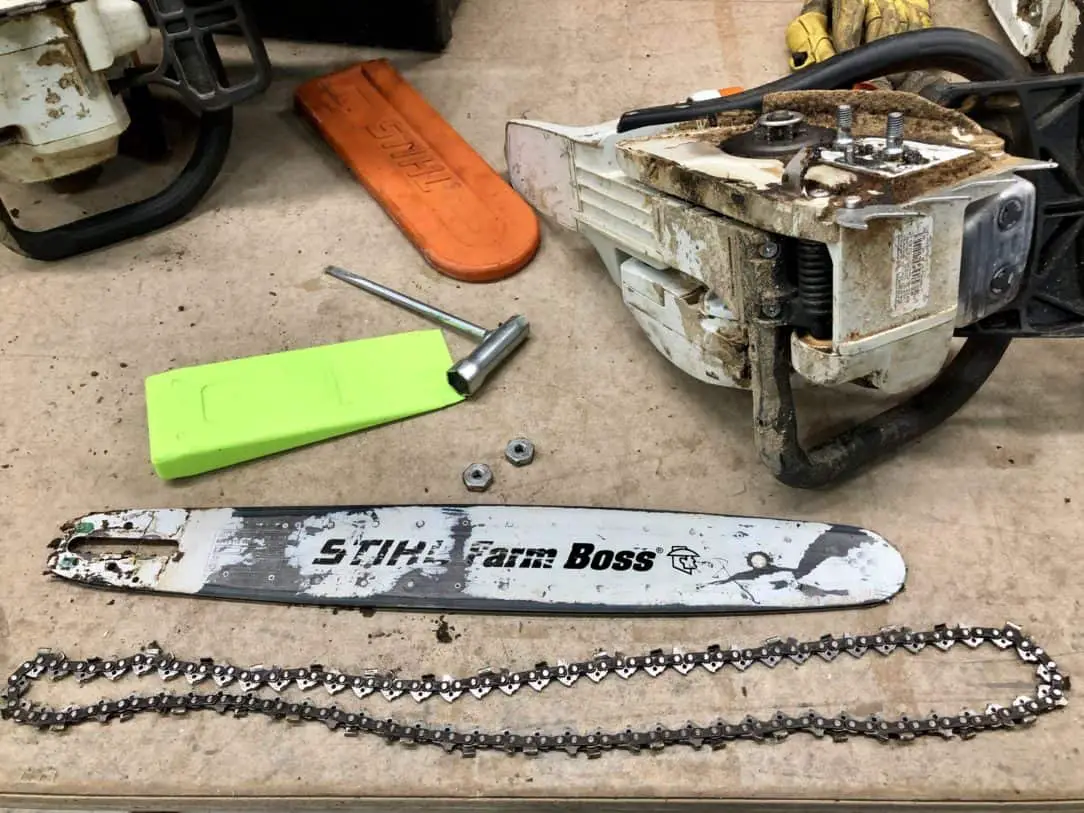
Take the bar and chain off of the chainsaw. Lay everything out.
We’ll be getting to the good stuff next.
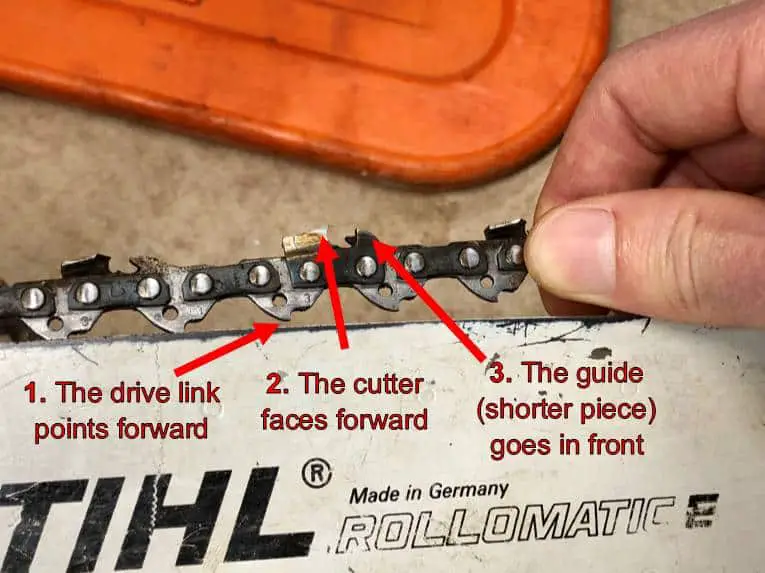
3. Identify the direction of the cut
There are 3 things on a chain that you can check really easily, to make sure it’s pointed in the correct direction.
Check out the notes on the photo below:
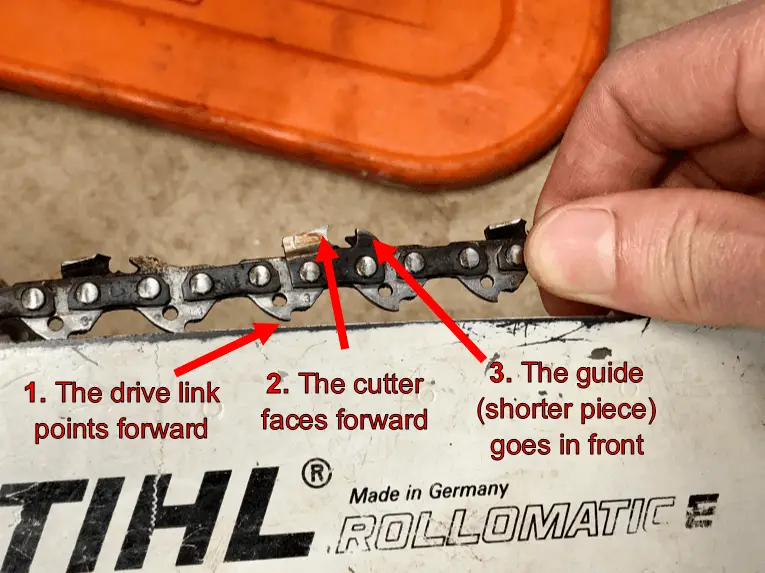
Honestly, probably just one of the 3 methods here would work fine, but if you want to be super thorough, you could check all three.
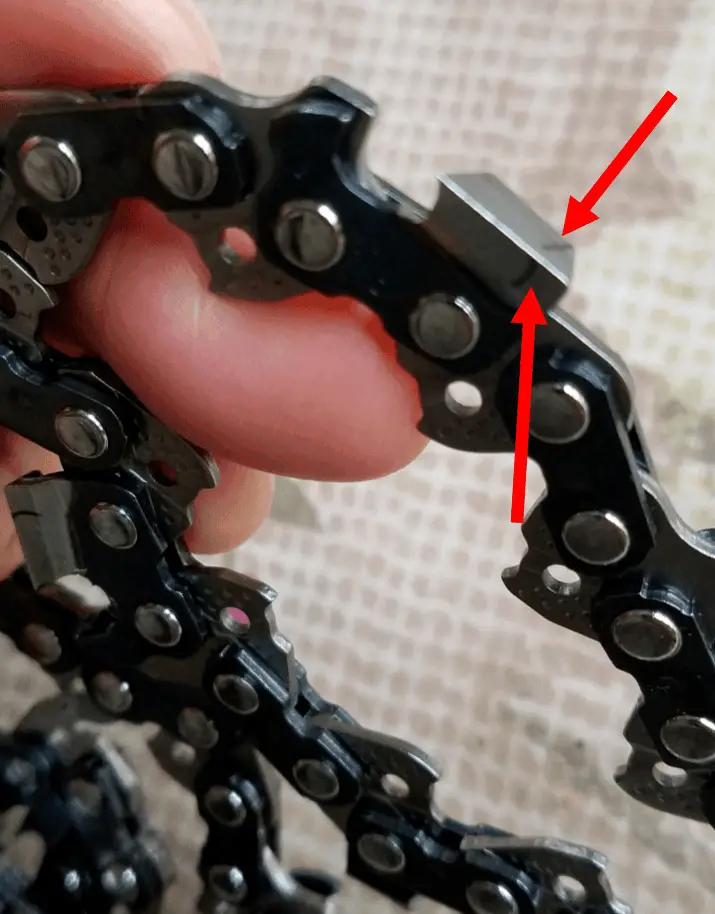
First thing to check is the drive link, which should be pointing forward. The drive link is the wave-shaped piece that fits into groove on the chainsaw bar. If that little wave is pointing towards the end of the bar (e.g. forward), then your chain is pointed in the correct direction.
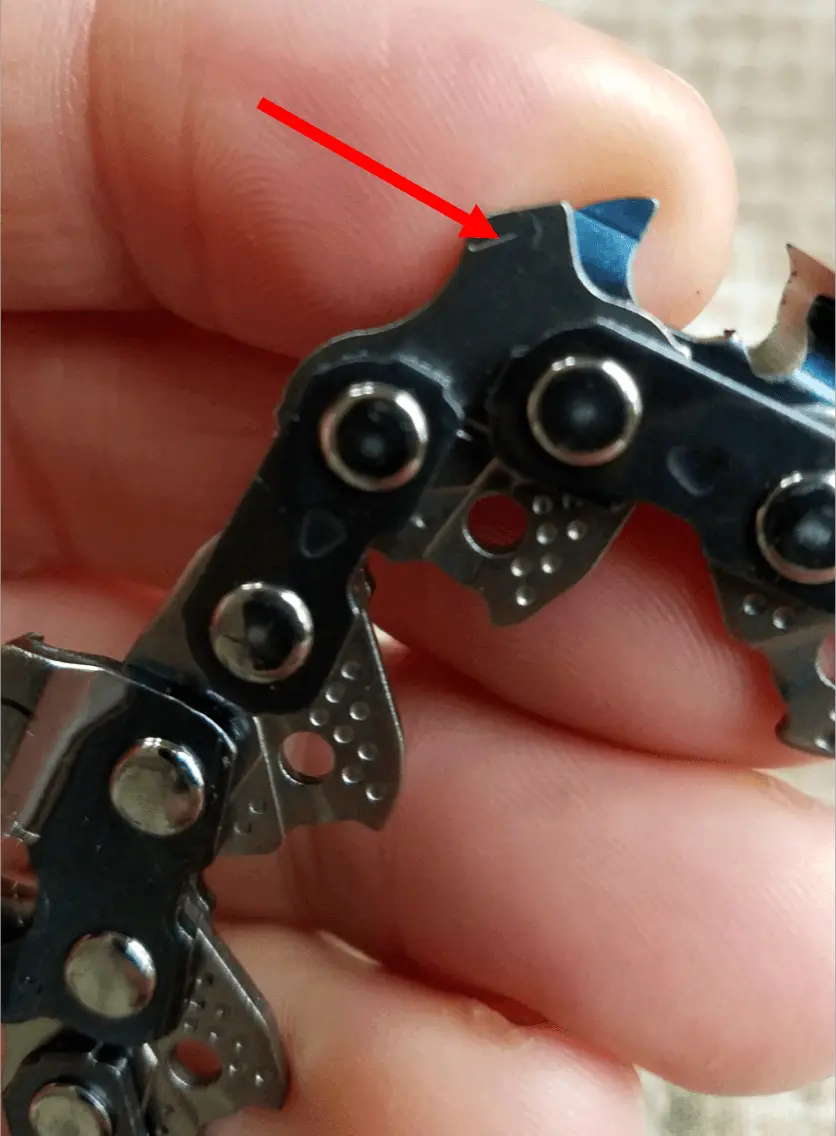
You can also check the cutter, which should also be pointing forward. The cutter is the only part of a chain that actually cuts the wood (the name says it all). There’s a couple ways you can tell which way the cutter is facing. You can touch it (maybe not the safest choice, be careful, or use a different method). Or, you can also tell from the shape of the metal. The front of the cutter is typically taller and more open than the back of the cutter.
Lastly, you can check that the guide is immediately in front of the cutter. The guide is often misunderstood. It’s actually not a cutting blade at all. It’s purpose is to control the amount of wood that is sliced by the cutter at a time (which controls the aggressiveness of the cut).
If any of this chain component terminology is unclear to you, or if you’re just interested to learn more, check out this in-depth explanation of the anatomy of a chainsaw chain.
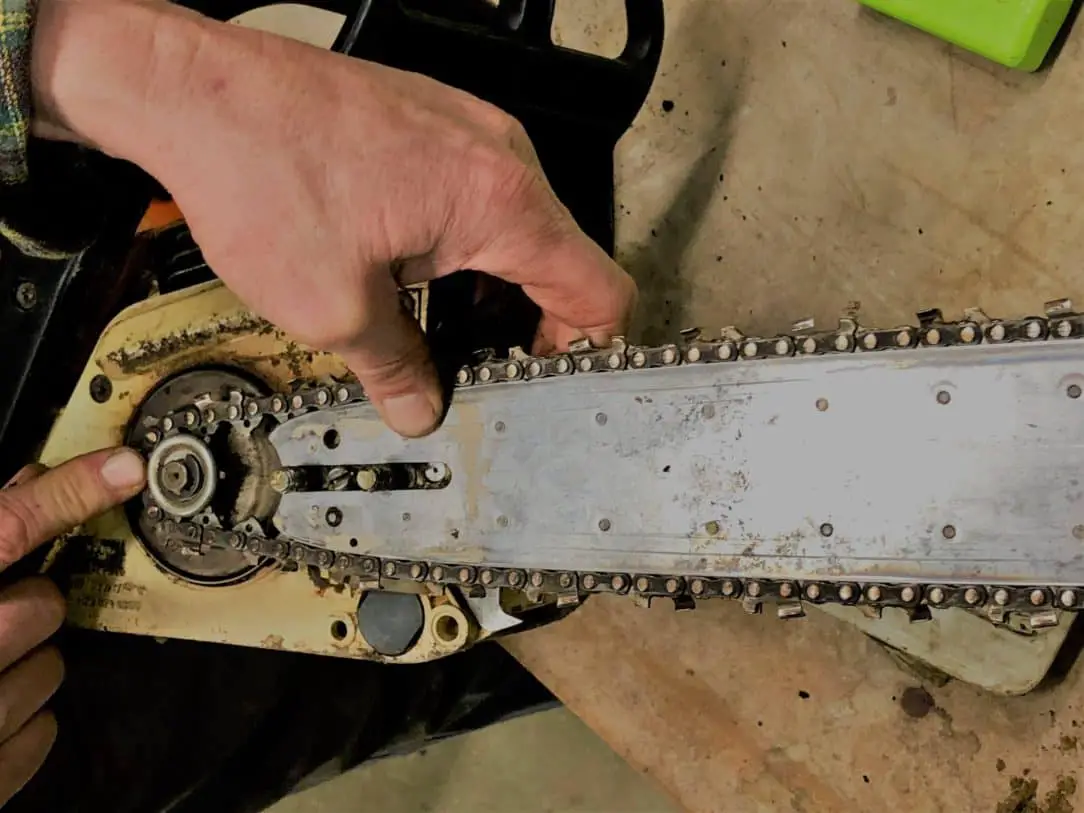
4. Reassemble and tighten
Once you’ve got your chain direction figured out, it’s time to put everything back together.
You may already know how to do this step, but if you don’t, no worries. We have a step-by-step guide for how to do that (with pictures), in this post.
Bonus: when to replace a chainsaw chain
If you’re checking your chain direction, then it might be because you aren’t getting the speed or quality of cut that you were expecting. Chain direction will definitely make it harder to finish a cut. However, even if you have the chain on properly, you might run into speed/quality issues if your chain is dull or damaged.
So, I’ve added this section to help you evaluate if your chain issue is actually from a dull/damaged chain, once you’ve already checked the direction.
Stihl, one of the world’s leading chainsaw manufacturers, has a great article about the 5 signs that a chainsaw chain is dull, which I’ve summarized below:
5 signs a chainsaw chain is dull
- You have to push the chainsaw to make a cut (the chain should do the work for you).
- The chainsaw makes fine sawdust, instead of large wood chips
- Things start smoking (despite proper lubrication and chain tension)
- The chainsaw “pulls” in one direction, creating a crooked cut
- The chainsaw shakes or bounces while cutting
If your chainsaw is doing any of the above, then you likely have a dull or damaged chain.
Should I sharpen or replace my chain?
Your next step will be to evaluate further, by simply examining the chain in order to find any chipped, damaged, or broken links. If there is clear damage or missing pieces, then you should go ahead and replace your chain.
However, if the chain appears to be intact and in good shape, then sharpening it will probably be sufficient. A good chain can usually handle a couple dozen sharpenings, depending on how much material you take off each time.
Chain manufacturers also include markings on the top/side of a chain’s cutter links, and on the chain’s guide links, which show how much material can be safely removed. See photos below for an example of these markings.
Putting it simply, don’t use a chain that has been sharpened beyond these markings. That’s not safe. Once you come up to those lines, it’s time to replace your chain.
Wrap-up
Alright, there you have it. By using the techniques above, you should be able to quickly get your chainsaw chain direction right, every time. And with the other steps, you should have everything you need to fix that backwards, dull, or broken chain.
If you have any questions, feel free to shoot us a note. We’d love to help.
Also, if this article answered your question, then I’d love for you to share it with someone else who might find it useful.
That’s all for now. Thanks for reading!